Showing posts with label chocolate. Show all posts

Saturday, April 14, 2012

Celebration Cake! Dark Chocolate Salted Caramel Layer Cake


I love any excuse to bake a delicious chocolatey cake and what better reason than to celebrate two birthdays!  We celebrated my brother and sister-in law's birthdays over Easter weekend so I decided to attempt a new cake.  I saw this cake a few months back on Pinterest and was waiting for the perfect time to give it a try.  It worked out great because I was able to make the cake layers Thursday night and assemble and frost the cake Friday morning before the family came to town.  It kept really well in the fridge until Saturday night when we finally got to dig in.  If you are like me, you probably only make celebration cakes at busy times, such as when your entire family is in town for a weekend, or you are traveling a distance to be at a special event.  Hence, I believe it's important to find recipes that can be made ahead of time to help maintain your sanity.  This decadent cake fits the bill!    

I warn you in advance, there are several difficult steps to this cake, but nothing you can't master with a little time (and a chemist for a husband!).  The cake is comprised of three layers of moist chocolate cake filled with silky, salted caramel Swiss meringue buttercream and enrobed in rich chocolate frosting.  This was my first attempt making Swiss meringue buttercream and while it was a bit tricky, the results are totally worth it.  I almost passed out on the kitchen floor after my first taste!    

Dark Chocolate Salted Caramel Layer Cake
from Annie's Eats and Sweetapolita (check out their blogs for beautiful pics of the finished cake!)

Ingredients:
 
Cake:
2¼ cups all-purpose flour
2¼ cups sugar
1 cup plus 2 tablespoons dark unsweetened cocoa powder
2¼ tsp. baking soda
1½ tsp. baking powder
1½ tsp. salt
6 tbsp. vegetable oil
1 cup plus 2 tbsp. buttermilk
1 cup plus 2 tbsp. brewed coffee (Note: This enhances the chocolate flavor.  Your cake will not taste like coffee.)
3 large eggs, at room temperature
1 tbsp. vanilla extract

Salted Caramel Filling:
1 cup sugar, divided
¼ cup water (I used closer to 1/3 cup after my first attempt failed)
¼ cup heavy cream
Generous pinch of sea salt, such as fleur de sel
4 large egg whites
1½ cup (3 sticks) unsalted butter, at room temperature

Chocolate Frosting:
12 oz. good quality semisweet or bittersweet chocolate, finely chopped
¼ cup unsweetened Dutch-process cocoa powder
¼ cup very hot water
1 cup plus 2 tbsp. (18 tbsp.) unsalted butter, at room temperature
1/3 cup plus 1 tbsp. confectioners’ sugar
Pinch of salt

Fleur de sel, for finishing


Directions:
Cake:
Preheat the oven to 350˚ F.  Grease and flour 3 8-inch baking pans.  Line the bottoms with parchment paper rounds.  In an electric mixer (you could probably mix by hand but the mixer makes it very easy), combine the flour, sugar, cocoa powder, baking soda, baking powder, and salt.  Mix on low speed to blend.  Add the vegetable oil, buttermilk, coffee, eggs, and vanilla and mix on low speed until well blended and completely incorporated.  Divide the batter evenly between the prepared pans.  If you have a kitchen scale, you can use it to make sure you have equal amounts of batter in each pan.  Bake 20-25 minutes, or until a toothpick inserted in the center comes out clean.  Mine might have been a tiny bit under baked since they sunk a bit while cooling, but they tasted great!  Let the cakes cool in the pans about 15 minutes, then invert onto a wire rack and allow to cool completely.  Remove the parchment paper.

Caramel Buttercream Filling:
Place ½ cup plus 2 tablespoons of the sugar in a medium saucepan.  Mix in the water.  (As stated in the ingredient list, I used closer to 1/3 cup of water because I ruined my first batch when all the water boiled out).  Bring the mixture to a boil over medium heat.  Stop stirring and let the caramel cook, gently swirling from time to time, until it is a deep amber color.  Watch carefully because it will go from a beautiful caramel to burned if left for too long.  Remove the mixture from the heat and slowly whisk in the cream (warning:  It will bubble up so be ready for that) and then the salt.  Set aside and let cool. 

Next, combine egg whites and the remaining ¼ cup plus 2 tablespoons sugar in a heatproof bowl set over a pot of simmering water.  Heat, whisking frequently, until the mixture reaches 160° F and the sugar has dissolved.  I also had to do this part twice since I accidentally scrambled the egg whites the first try.  My temp registered closer to 140, so I would just watch carefully and if you see the eggs starting to scramble take it off the heat asap!  Transfer the mixture to the bowl of a stand mixer fitted with the whisk attachment.  Beat on medium-high speed until stiff peaks form and the mixture has cooled to room temperature, about 8 minutes.  The bowl will feel cool to the touch.

Reduce the speed to medium and add the butter, 2 tablespoons at a time, adding more once each addition has been incorporated.  If the frosting looks soupy or curdled, continue to beat on medium-high speed until thick and smooth again, about 3-5 minutes more.  Blend in the cooled caramel (reheat caramel a minute or so if it has hardened too much) until smooth and completely incorporated, scraping down the sides of the bowl as needed.

Chocolate Frosting:
 
Place the chopped chocolate in a heatproof bowl set over a pan of simmering water.  Heat, stirring occasionally, until the chocolate is completely melted and smooth.  Set aside and let cool to room temperature.  In a small bowl, combine the cocoa powder and water and stir until smooth.  In the bowl of an electric mixer, combine the butter, confectioners’ sugar and salt.  Beat on medium-high speed until light and fluffy, about 5 minutes.  With the mixer on low speed, gradually blend in the melted and cooled chocolate until well incorporated.  Blend in the cocoa powder-water mixture until smooth.

To assemble the cake, level the cake layers if necessary.  Place one of the cake layers on a cake board or serving platter.  Top with half of the caramel buttercream and smooth in a thick, even layer.  Place a second cake layer on top and smooth the remaining caramel buttercream over that.  Place the final cake layer on top.  I put the top layer upside down to make the top nice and flat.  
Cover the top and sides of the cake with the chocolate frosting and smooth with an offset spatula.  Refrigerate until ready to serve.  Because of the high butter content in the frosting and filling (5 sticks!!), we found it was best at room temperature which took about two hours out of the fridge.  Before serving, sprinkle with fleur de sel. 


Yum!

Thursday, September 22, 2011

Chocolate-Caramel Slice

Or Millionaire's Shortbread, according to my hubby.  Either way, this stuff is dangerous to have around.  In keeping with my chocolate-caramel-sea salt theme from yesterday, I have another equally addictive recipe.  My mom sent me this one earlier in the summer and it was love at first click.  Rich, buttery shortbread topped with a thick layer of sweet caramel and finished with a thin layer of bittersweet chocolate, these bars pretty much represent all that I love about baking and sweets.  
 
Some reviews complained that these were too sweet but I think cut into small bites with a flourish of sea salt on top, they are the perfect treat.  I am quickly stockpiling ideas for Christmas and this one will probably make the list too!  I found it very helpful to cut these while they are still cold in order to get nice clean lines.  I may also try lining the pan with foil next time so I can lift them out before cutting. 
 
Chocolate-Caramel Slice
makes 20-24 pieces (I would aim for 24-28)

Crust
1 cup all purpose flour
1/4 cup (packed) golden brown sugar
2 teaspoons cornstarch
1/4 teaspoon salt
1/2 cup (1 stick) chilled unsalted butter, cut into 1/2-inch cubes
1 tablespoon ice water
1 large egg yolk

Toppings
1 (14-ounce) can sweetened condensed milk
1/2 cup (packed) golden brown sugar
6 tablespoons (3/4 stick) unsalted butter, diced
2 tablespoons golden syrup (such as Lyle's Golden Syrup) or dark corn syrup (I used dark corn syrup but apparently Lyle's can be found at World Market)
1 teaspoon vanilla extract

6 ounces bittersweet or semisweet chocolate, chopped
3 tablespoons whipping cream
Flaked sea salt

For crust:
Preheat oven to 350°F. Butter 11x7x2-inch metal baking pan. Blend first 4 ingredients in processor. Add butter. Using on/off turns, blend until coarse meal forms. Add 1 tablespoon ice water and egg yolk. Blend until moist clumps form. Press dough onto bottom of pan; pierce all over with fork. Bake until golden, piercing if crust bubbles, about 20 minutes. Cool completely. 
 
For toppings:
Whisk first 5 ingredients in medium saucepan over medium heat until sugar dissolves, butter melts, and mixture comes to boil. Attach candy thermometer to side of pan. Boil gently until caramel is thick and temperature registers 225°F, whisking constantly, about 6 minutes (took me longer, just keep an eye on the thermometer). Pour caramel evenly over crust; cool 15 minutes to set.
 
Meanwhile, melt chocolate with cream in microwave in 15-second intervals, stirring occasionally. Spread chocolate over warm caramel; sprinkle with sea salt. Refrigerate until chocolate is set, at least 1 hour. DO AHEAD Can be made 3 days ahead. Cover and keep refrigerated.  (I also froze these and they thawed perfectly).
Cut dessert lengthwise into 4 strips. Cut each strip crosswise into 5 or 6 (or 7) slices. Transfer to platter and serve.

The only complaint I had about this recipe is that my chocolate didn't turn out very smooth.  In the past I have added a teaspoon or so of shortening and this helps make the chocolate shiny and smooth so I might try that next time.  
 

Enjoy!


Wednesday, September 21, 2011

Dark Chocolate Caramel Truffles with Fleur de Sel

 
I went on a chocolate kick a few weeks ago so be ready for some decadence coming your way.  I have never made truffles before and these little suckers turned out great.  These truffles are made from a fabulous mix of salty caramel blended with bittersweet dark chocolate, enrobed in a crisp, chocolate shell and topped with a sprinkle of fleur de sel.  
 
They are intensely rich and the recipe says it should make about 32 but mine only made about 25 so next time I will try to make them a bit smaller - just a couple of bites is more than enough to satisfy your sweet tooth!  I would love to make these again around the holidays a box them up as hostess gifts.  They are easy enough to knock out a double batch but fancy enough to make the recipient feel extra special.  Just be sure you leave yourself plenty of time because the recipe requires multiple rounds of chilling.
 
Dark Chocolate Caramel Truffles with Fleur de Sel
adapted from Epicurious (I made a couple of changes based on the reviews, original recipe can be found via the link)
Yields around 32

20 ounces bittersweet or semisweet chocolate, finely chopped, divided (I only used about 16 ounces, choose a good quality chocolate since this is the main ingredient)
2/3 cup sugar
4 tablespoons water
2/3 cup whipping cream
1/4 teaspoon fleur de sel
1/2 cup unsweetened cocoa powder
Additional fleur de sel
Place 8 ounces chocolate in metal bowl over saucepan of barely simmering water (do not allow bottom of bowl to touch water); stir until chocolate is smooth. I used the microwave to melt my chocolate in 30 second increments and it worked just fine.  Remove chocolate from over water.
Combine sugar and water in small saucepan. Stir over medium heat until sugar dissolves, occasionally brushing sides of pan with wet pastry brush. Increase heat; boil until syrup is deep amber color, brushing down sides and swirling pan occasionally, about 4 minutes (mine took longer, just be sure you keep a close eye on it because it will turn fast!). 


Add cream (mixture will bubble). Stir over very low heat until caramel is smooth.  
Mix caramel and 1/4 teaspoon fleur de sel into melted chocolate. 
 
Chill until truffle filling is firm, at least 3 hours.
Place cocoa in bowl. Using 1 tablespoon truffle filling for each truffle, roll into balls, then roll in cocoa. Arrange on baking sheet. Cover; chill overnight. 
 
Line 13x9x2-inch baking sheet with foil. Place remaining 12 ounces chocolate (I think I used around 8 and used the microwave again) in medium metal bowl over saucepan of barely simmering water (do not allow bottom of bowl to touch water); stir until chocolate is melted and smooth and thermometer inserted into chocolate registers 115°F. Remove bowl from over water. Working quickly, submerge 1 truffle in melted chocolate. Using fork, lift out truffle and tap fork against side of bowl to allow excess coating to drip off. Transfer truffle to prepared sheet. Repeat with remaining truffles. Sprinkle truffles lightly with additional fleur de sel. Let stand until coating sets, at least 1 hour. (Can be made 1 week ahead. Cover and chill. I kept some of mine in the freezer and they tasted great so if you did choose to do these for the holidays you could probably make a big batch and then freeze until party time.  Bring to room temperature before serving.)
 
 
Perfect as an after dinner treat with a glass of red wine and your honey...
 
Or for breakfast with a mug of steamy coffee when that bowl of cereal just won't cut it!

Hope you are all having a great week.  Please comment with links to your favorite truffle recipes - I have a feeling this could become an addiction!

Monday, May 16, 2011

Share Our Strength Bake Sale

I have to start out this post by saying how much I love the St. Louis blogger scene.  We've lived in St. Louis now for about two months and as many of you who have moved around a lot know, it can be difficult to meet new friends in a new city.  I was lucky enough to stop by Denise's blog at Eat Laugh Love where she did a post to promote the Share Our Strength Blogger Bake Sale.  Share Our Strength is a national nonprofit with the goal to end childhood hunger by the year 2015.  It's scary to think that children in our own neighborhoods aren't getting enough food and nutrients to live a healthy life.  When I heard about the opportunity to contribute, I really wanted to get involved.  I thought I had missed the bake sale but through a couple of comments and emails, I found out I could still get in on it!  I had a great time baking for this event and it was lucky to meet some fabulous ladies (and gents!) in the process.  I'm looking forward to attending future blogger events and getting to know all of these lovely St. Louis bloggers!

The amazing Stef of Cupcake Project, Kimberly of Rhubarb and Honey and Andrew of Andrew Mark Veety (check out his awesome homemade pretzels - people went nuts over these!) organized the event which was held at Sappington Farmers' Market.  Even with the unseasonably cold, dreary weather, the St. Louis foodies came out in full force to support the cause (and feed their sugar cravings!).  All in all, the event raised over $800!!

Since I only had a couple days to prepare for the bake sale, I wanted to make something I had already tried and succeeded at before.  I also wanted to do at least one child friendly treat.  I ended up going with Loaded Rice Krispie Treats and a twist on the classic Ohio State Chocolate Buckeyes Candy - YUM!  Here are the recipes.

Loaded Rice Krispie Treats

Ingredients:
2 recipes classic Rice Krispie Treats
2/3 c. M&M's
2/3 c. sprinkles
2/3 c. white chocolate chips
plus a handful of each to put on top
*Choose any candy you would like.  I would like to try crushed pretzels and bits of heath bars next time!

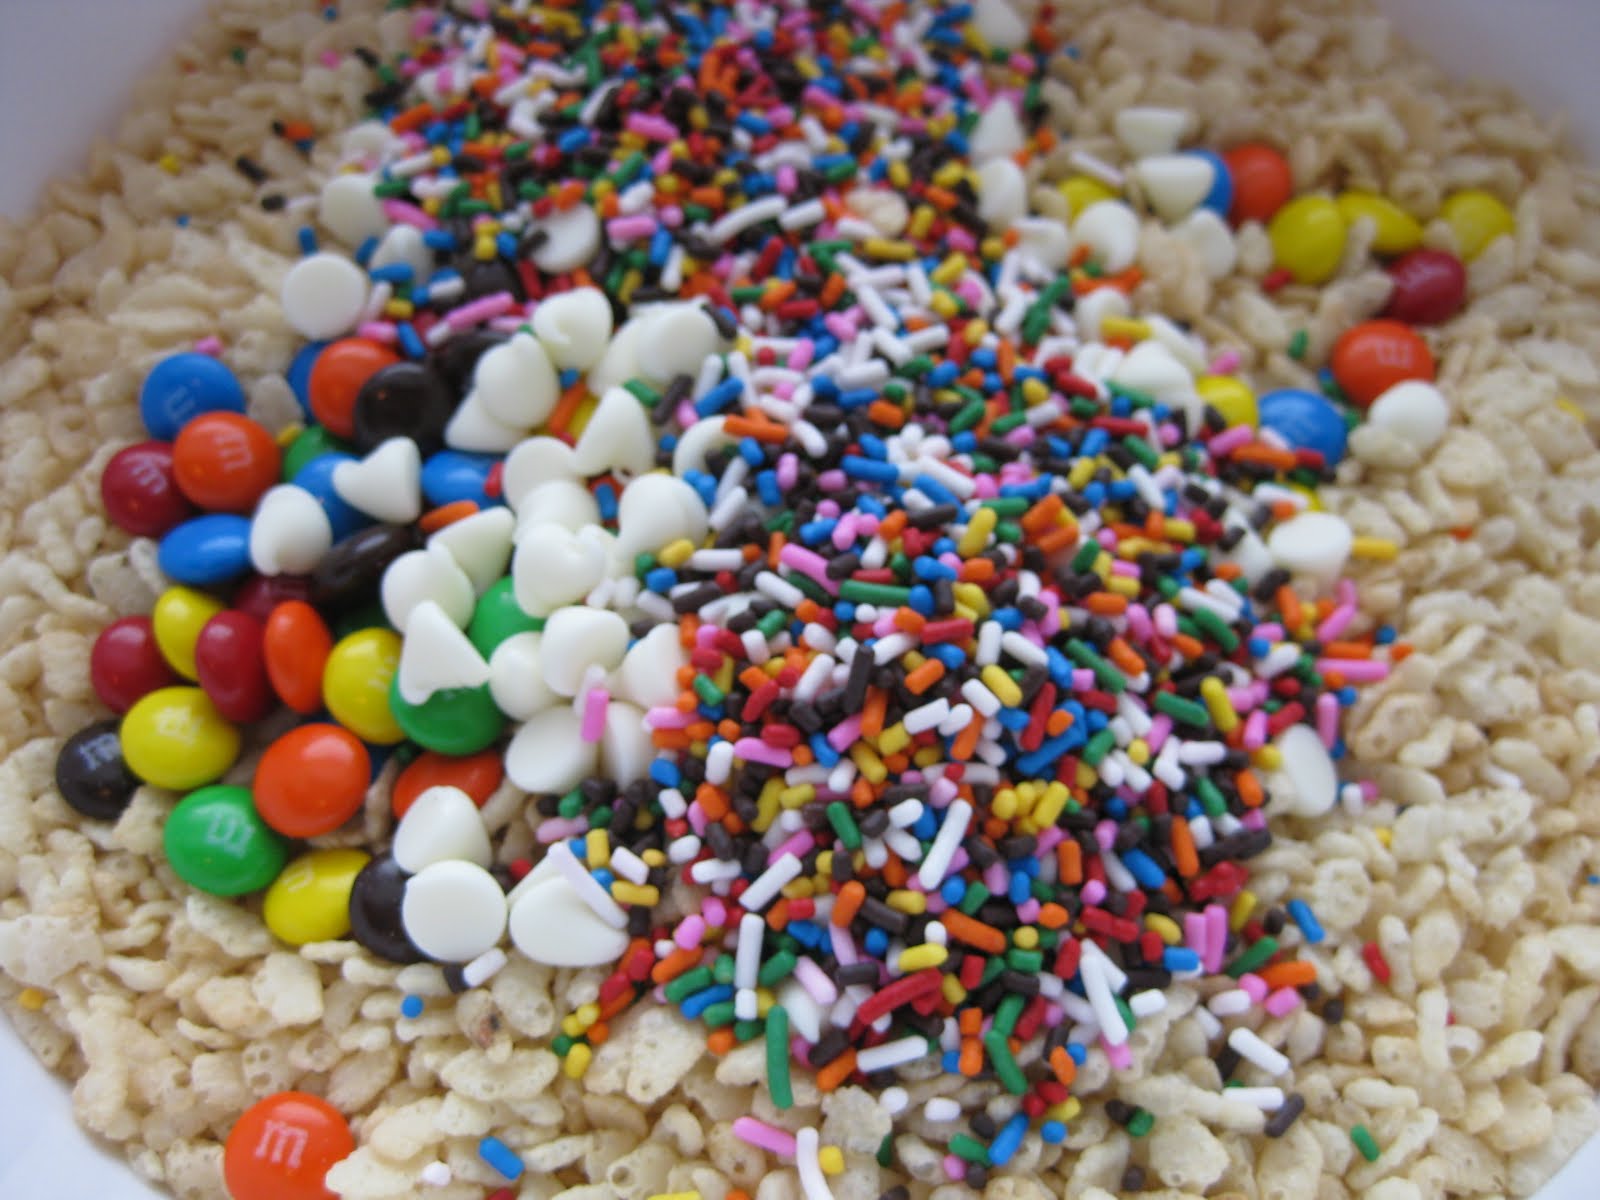
Place rice krispies and candy in a large bowl. 
I would like to go swimming in a pool filled with this!
Follow directions for making a double batch of rice krispie treats.  You can make a single batch but I like mine extra thick.  Once butter and marshmallows are melted, pour mixture over rice krispies and candy and mix together.  Working quickly, press mixture into a greased 9x13 pan and press extra candy into the top. 
 Allow to cool and cut into 12 squares.  Watch kids go crazy when they see them at a bake sale!
Chocolate Peanut Butter Pretzel Bites

Ingredients
1 1/2 c. creamy peanut butter
1 tsp. vanilla
1 stick butter, softened
1 lb. powdered sugar
9 oz. semi-sweet chocolate chips
2 tbsp. Crisco
pretzels (I used the square-shaped "waffle" ones but any small kind will work.)

Mix peanut butter, vanilla, butter and powdered sugar.  Roll into little balls and press between two pretzels.  Put on wax paper or a silpat and freeze until firm. 

Melt chocolate chips and Crisco in a small bowl.  I melted mine in the microwave in 30 second bursts until it was smooth, about a minute.  Dip each peanut butter pretzel bite halfway into the chocolate.  Return to wax paper and freeze until chocolate sets.  Delicious!


I hope you enjoy these super simple, super delicious recipes!  If you would like to give to the cause, you can donate over at Share Our Strength.

What is your favorite bake sale treat?  I'm a sucker for anything with bright colors!

Friday, May 6, 2011

When all else fails...

bake brownies.

and follow the recipe to a t.

(what does that mean anyway?).
Now that I'm blogging more often, I have been trying lots of new recipes.  I've also been trying to put a spin on recipes to make them my own.  Sometimes I get wonderful results and I'm happy I tried something new.  Other times, not so much.  Here are some examples of recent baking fails:
  
I did get a few good pavlovas out of this batch, but others just stuck to the tray and the tops popped off!
         
 This one, don't even ask.  Ok, ask.  No, they are not my attempt at making Mr. Hankey cookies.  I was actually trying to make chocolate churros.  Doesn't that sound good? Eh, not so much...

So when I woke up yesterday, I was determined to make something I knew I would love and that would be nearly impossible to screw up.  

Brownies!

Now normally I would go straight for the box mix (it's good stuff!) but there is also something magical about a delicious homemade brownie.  I remembered back to early in the year when Bon Appetit featured Browned Butter Walnut Brownies as the cover recipe and knew I wanted to try it.  Although these brownies got mixed reviews (people seemed to love 'em or hate 'em), it was love at first bite for me! 

Many of the reviews stated that the browned butter gave the brownies a distinctive "nutty" flavor.  I'm not sure if this was actually due to the browned butter or the fact that they do have a cup of walnuts in them.  That said, I will make it exactly the same in the future because I loved them.  However, they are packed with nuts so you can always cut back if you wish. 

Ok, all this talking is making me hungry.  Let's get to the recipe!
Cocoa Brownies with Browned Butter and Walnuts
 
Ingredients:
Nonstick vegetable oil spray
10 tablespoons (1 1/4 sticks) unsalted butter, cut into 1-inch pieces
1 1/4 cups sugar
3/4 cup natural unsweetened cocoa powder (spooned into cup to measure, then leveled)
1 teaspoon vanilla extract
2 large eggs, chilled
1/3 cup plus 1 tablespoon unbleached all purpose flour
1 cup walnut pieces

Position rack in bottom third of oven; preheat to 325°F. Line 8x8x2-inch metal baking pan with foil, pressing foil firmly against pan sides and leaving 2-inch overhang. Coat foil with nonstick spray. Melt butter in medium saucepan over medium heat. Continue cooking until butter stops foaming and browned bits form at bottom of pan, stirring often, about 5 minutes. 
 
Tip: I find that it is easier to see the butter changing colors if you use a pan with a light colored bottom.
Maybe I should have stopped here but I let it go a little bit longer...

...and ended up with this.  The brownies still tasted amazing but just be careful because once it goes, it goes fast!

Remove from heat; immediately add sugar, cocoa, 2 teaspoons water, vanilla, and 1/4 teaspoon (generous) salt. Stir to blend. Let cool 5 minutes (mixture will still be hot). Add eggs to hot mixture 1 at a time, beating vigorously to blend after each addition. When mixture looks thick and shiny, add flour and stir until blended. Beat vigorously 60 strokes. Stir in nuts. Transfer batter to prepared pan.

Bake brownies until toothpick inserted into center comes out almost clean (with a few moist crumbs attached), about 25 minutes. (Mine seemed quite gooey after 25 minutes but I stuck with the recipe and they turned out fudgy and delicious) Cool in pan on rack. Using foil overhang, lift brownies from pan. Cut into 4 strips. Cut each strip crosswise into 4 brownies.  They are rich so you could also cut each brownie in half diagonally and have twice the brownies!
Delicious!  I ate four in a row and made Greg bring the rest to work to save me from myself!


Oh wait!  I forgot I saved one for you (hope you don't mind I already took a bite out of it!)

Questions:
If you could only pick one food magazine to subscribe to, what would it be?

If you are recipe developer, how do you do it, especially when it comes to baking?  I do ok when I'm throwing ingredients together to make a soup or a dinner, but I've had a ton of baking disasters when I try to do my own thing!

Have a great weekend everybody!