Showing posts with label candy. Show all posts

Wednesday, September 21, 2011

Dark Chocolate Caramel Truffles with Fleur de Sel

 
I went on a chocolate kick a few weeks ago so be ready for some decadence coming your way.  I have never made truffles before and these little suckers turned out great.  These truffles are made from a fabulous mix of salty caramel blended with bittersweet dark chocolate, enrobed in a crisp, chocolate shell and topped with a sprinkle of fleur de sel.  
 
They are intensely rich and the recipe says it should make about 32 but mine only made about 25 so next time I will try to make them a bit smaller - just a couple of bites is more than enough to satisfy your sweet tooth!  I would love to make these again around the holidays a box them up as hostess gifts.  They are easy enough to knock out a double batch but fancy enough to make the recipient feel extra special.  Just be sure you leave yourself plenty of time because the recipe requires multiple rounds of chilling.
 
Dark Chocolate Caramel Truffles with Fleur de Sel
adapted from Epicurious (I made a couple of changes based on the reviews, original recipe can be found via the link)
Yields around 32

20 ounces bittersweet or semisweet chocolate, finely chopped, divided (I only used about 16 ounces, choose a good quality chocolate since this is the main ingredient)
2/3 cup sugar
4 tablespoons water
2/3 cup whipping cream
1/4 teaspoon fleur de sel
1/2 cup unsweetened cocoa powder
Additional fleur de sel
Place 8 ounces chocolate in metal bowl over saucepan of barely simmering water (do not allow bottom of bowl to touch water); stir until chocolate is smooth. I used the microwave to melt my chocolate in 30 second increments and it worked just fine.  Remove chocolate from over water.
Combine sugar and water in small saucepan. Stir over medium heat until sugar dissolves, occasionally brushing sides of pan with wet pastry brush. Increase heat; boil until syrup is deep amber color, brushing down sides and swirling pan occasionally, about 4 minutes (mine took longer, just be sure you keep a close eye on it because it will turn fast!). 


Add cream (mixture will bubble). Stir over very low heat until caramel is smooth.  
Mix caramel and 1/4 teaspoon fleur de sel into melted chocolate. 
 
Chill until truffle filling is firm, at least 3 hours.
Place cocoa in bowl. Using 1 tablespoon truffle filling for each truffle, roll into balls, then roll in cocoa. Arrange on baking sheet. Cover; chill overnight. 
 
Line 13x9x2-inch baking sheet with foil. Place remaining 12 ounces chocolate (I think I used around 8 and used the microwave again) in medium metal bowl over saucepan of barely simmering water (do not allow bottom of bowl to touch water); stir until chocolate is melted and smooth and thermometer inserted into chocolate registers 115°F. Remove bowl from over water. Working quickly, submerge 1 truffle in melted chocolate. Using fork, lift out truffle and tap fork against side of bowl to allow excess coating to drip off. Transfer truffle to prepared sheet. Repeat with remaining truffles. Sprinkle truffles lightly with additional fleur de sel. Let stand until coating sets, at least 1 hour. (Can be made 1 week ahead. Cover and chill. I kept some of mine in the freezer and they tasted great so if you did choose to do these for the holidays you could probably make a big batch and then freeze until party time.  Bring to room temperature before serving.)
 
 
Perfect as an after dinner treat with a glass of red wine and your honey...
 
Or for breakfast with a mug of steamy coffee when that bowl of cereal just won't cut it!

Hope you are all having a great week.  Please comment with links to your favorite truffle recipes - I have a feeling this could become an addiction!

Monday, May 16, 2011

Share Our Strength Bake Sale

I have to start out this post by saying how much I love the St. Louis blogger scene.  We've lived in St. Louis now for about two months and as many of you who have moved around a lot know, it can be difficult to meet new friends in a new city.  I was lucky enough to stop by Denise's blog at Eat Laugh Love where she did a post to promote the Share Our Strength Blogger Bake Sale.  Share Our Strength is a national nonprofit with the goal to end childhood hunger by the year 2015.  It's scary to think that children in our own neighborhoods aren't getting enough food and nutrients to live a healthy life.  When I heard about the opportunity to contribute, I really wanted to get involved.  I thought I had missed the bake sale but through a couple of comments and emails, I found out I could still get in on it!  I had a great time baking for this event and it was lucky to meet some fabulous ladies (and gents!) in the process.  I'm looking forward to attending future blogger events and getting to know all of these lovely St. Louis bloggers!

The amazing Stef of Cupcake Project, Kimberly of Rhubarb and Honey and Andrew of Andrew Mark Veety (check out his awesome homemade pretzels - people went nuts over these!) organized the event which was held at Sappington Farmers' Market.  Even with the unseasonably cold, dreary weather, the St. Louis foodies came out in full force to support the cause (and feed their sugar cravings!).  All in all, the event raised over $800!!

Since I only had a couple days to prepare for the bake sale, I wanted to make something I had already tried and succeeded at before.  I also wanted to do at least one child friendly treat.  I ended up going with Loaded Rice Krispie Treats and a twist on the classic Ohio State Chocolate Buckeyes Candy - YUM!  Here are the recipes.

Loaded Rice Krispie Treats

Ingredients:
2 recipes classic Rice Krispie Treats
2/3 c. M&M's
2/3 c. sprinkles
2/3 c. white chocolate chips
plus a handful of each to put on top
*Choose any candy you would like.  I would like to try crushed pretzels and bits of heath bars next time!

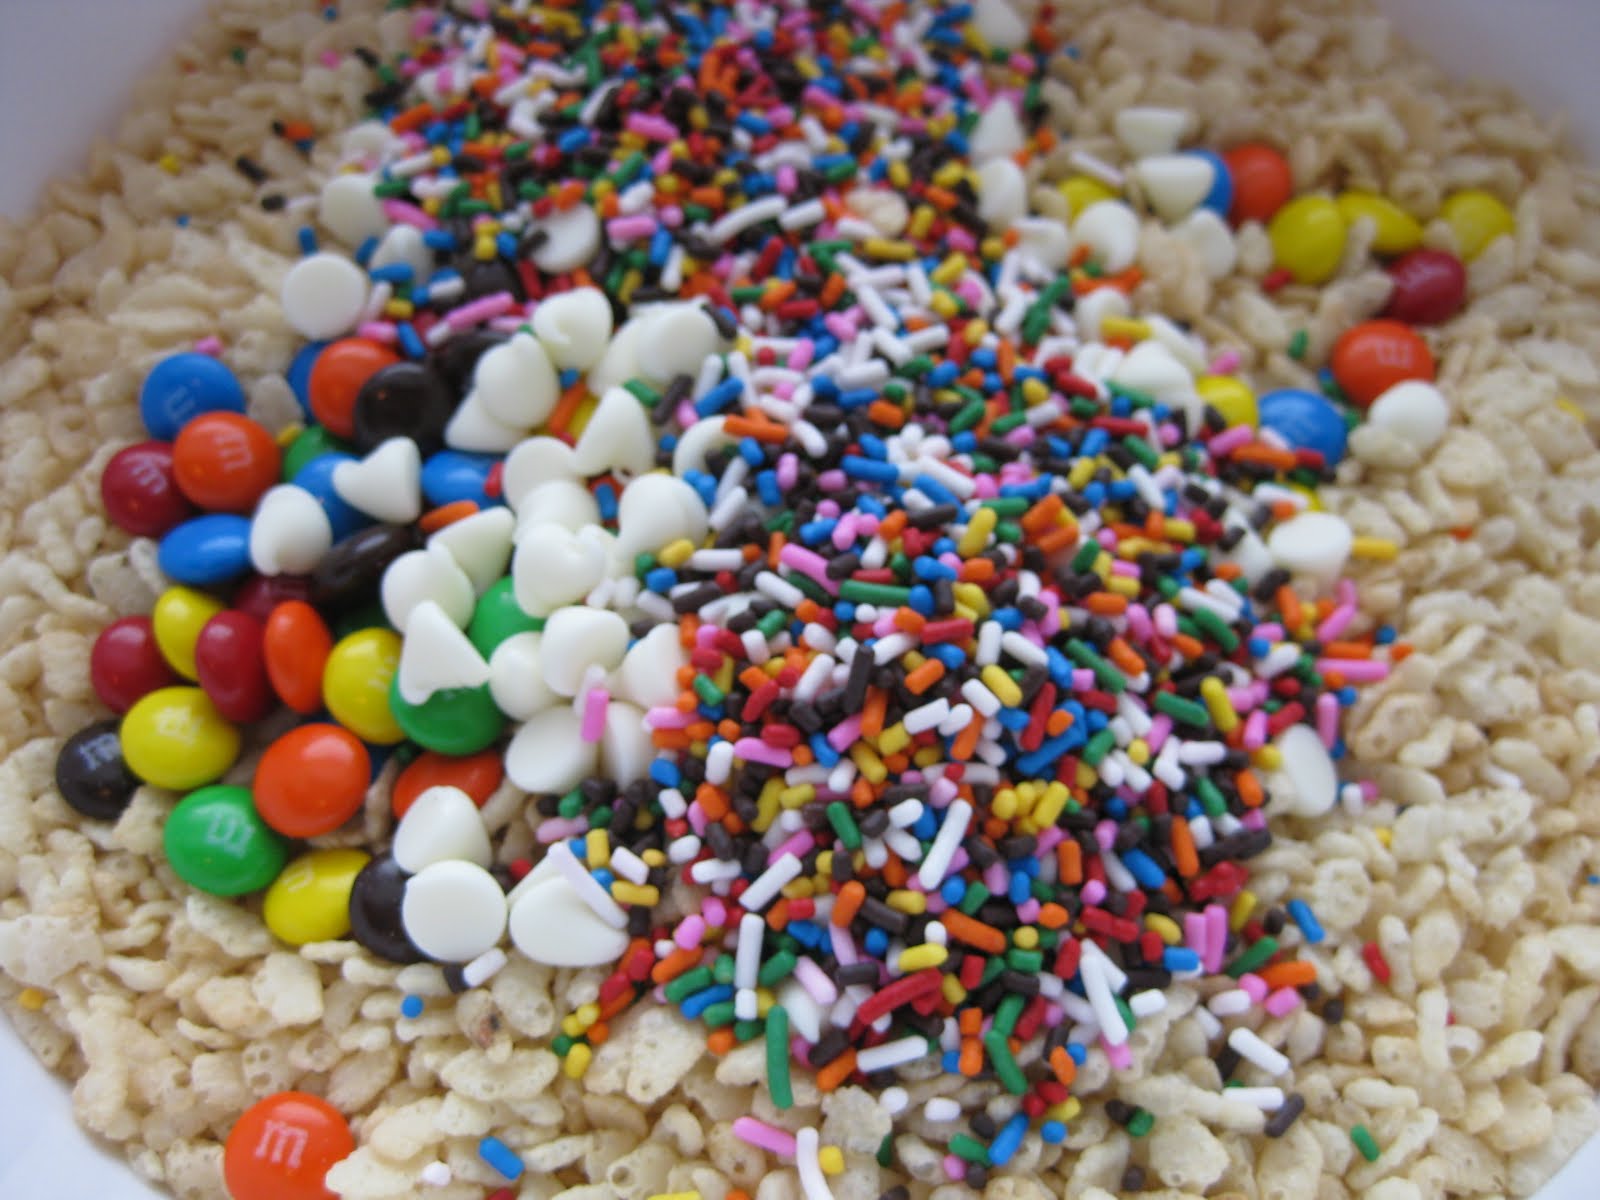
Place rice krispies and candy in a large bowl. 
I would like to go swimming in a pool filled with this!
Follow directions for making a double batch of rice krispie treats.  You can make a single batch but I like mine extra thick.  Once butter and marshmallows are melted, pour mixture over rice krispies and candy and mix together.  Working quickly, press mixture into a greased 9x13 pan and press extra candy into the top. 
 Allow to cool and cut into 12 squares.  Watch kids go crazy when they see them at a bake sale!
Chocolate Peanut Butter Pretzel Bites

Ingredients
1 1/2 c. creamy peanut butter
1 tsp. vanilla
1 stick butter, softened
1 lb. powdered sugar
9 oz. semi-sweet chocolate chips
2 tbsp. Crisco
pretzels (I used the square-shaped "waffle" ones but any small kind will work.)

Mix peanut butter, vanilla, butter and powdered sugar.  Roll into little balls and press between two pretzels.  Put on wax paper or a silpat and freeze until firm. 

Melt chocolate chips and Crisco in a small bowl.  I melted mine in the microwave in 30 second bursts until it was smooth, about a minute.  Dip each peanut butter pretzel bite halfway into the chocolate.  Return to wax paper and freeze until chocolate sets.  Delicious!


I hope you enjoy these super simple, super delicious recipes!  If you would like to give to the cause, you can donate over at Share Our Strength.

What is your favorite bake sale treat?  I'm a sucker for anything with bright colors!

Tuesday, April 12, 2011

Inside Out Reese Easter Eggs

Say what?  Yep, I went there.

 
I've been seeing all kinds of recipes for homemade Reese eggs all over the Internets and decided I wanted to give it a try myself.  Among my favorite childhood Easter memories are finding the egg hidden in my grandparents' mailbox every year, chowing down on my mom's dye stained deviled eggs and sinking my teeth into these chocolatey, peanut buttery treats.  Now don't get me wrong, nothing can replace the original, but there is something about making your own that just makes it taste even more special.


The idea to make the inside out began when I realized I did not have regular peanut butter, but I did have dark chocolate peanut butter.  Not sure what kind of normal person has chocolate pb and not regular but let's just go with it.  From there, a dream was brought to life...read on for the dirty details.

Inside Out Reese Easter Eggs
Makes about 15 eggs

Ingredients:
3/4 c. chocolate peanut butter (I used Dark Chocolate Dreams from Peanut Butter & Co.)
1 tsp. vanilla
1/2 stick butter
2 c. powdered sugar
2 oz. semi-sweet chocolate chips, melted
10 oz. peanut butter chips
2 tbsp. vegetable shortening
jimmies or your choice of decorations

Mix peanut butter, vanilla, butter and powdered sugar together.  Add melted chocolate chips to mixture.  Mixture will be slightly crumbly.  Form dough into "eggs" using your hands.  Be sure to press the mixture firmly together.  Place eggs on a wax paper or silicone mat lined baking sheet and freeze until firm (roughly an hour).  

Ok, they aren't exactly cute yet, but bear with me.

Next, melt the peanut butter chips and shortening in a microwave safe bowl.  I melted mine for about 20 seconds at a time stirring between until completely melted.  Dip each egg in the peanut butter, covering to coat.  I scooped mine out with a fork and transferred back to the baking sheet.  Quickly sprinkle with jimmies before peanut butter coating sets.
 
Look!  Chocolate on the inside, peanut butter on the outside!

If you have leftover melted peanut butter, go ahead and make yourself some pb bark, it's good for the soul!


Hope you enjoy this recipe!


What surprising twists have you tried on a classic recipe?  Feel free to share links in the comments!


Monday, September 28, 2009

3 Musketeer Bars!

Hello everyone! I am back today with a recipe for homemade 3 Musketeer Bars. Can I just say, YUM! After purchasing a candy thermometer a couple of months ago, I've been waiting for the perfect opportunity to make some candy. I have a feeling this trend will continue as the holidays approach since candy and sweets are always the perfect gift. Here's the recipe:

3 Musketeer Bars

Ingredients:
3 cups sugar
3/4 cup light corn syrup
3/4 cup water
1/8 tsp. salt
3 egg whites
1/3 cup semi sweet chocolate chips
2 bags milk chocolate chips (12 oz. each)

  • In a large saucepan over medium heat, combine the sugar, corn syrup, water, and salt. Heat, stirring, to boiling, then continue to cook, using a candy thermometer to monitor the temperature (this took a good half an hour or so for me, it's possible I could have done it faster but I didn't want to risk burning the mixture). Beat the egg whites until they are stiff and form peaks. Don't use a plastic bowl for this. When the sugar solution comes to 270 degrees F, or the soft-crack stage, remove from the heat and pour the mixture in thin streams into the egg whites, blending completely with a mixer set on low speed. Continue to mix until the candy begins to harden to the consistency of dough. This may take as long as 20 minutes (this part is true!). At this point, add the semisweet chocolate chips.
  • Remember that the candy must already be at the consistency of dough when you add the chocolate; the nougat will thicken no more after the chocolate is added. When the chocolate is thoroughly blended and the nougat has thickened, press it into a greased 9x9-inch pan. Refrigerate until firm, about 30 minutes. With a sharp knife, cut the candy in half down the middle of the pan. Then cut across into 7 segments to create a total of 14 bars. (I used an 8x8 pan and cut the bars into cute squares - they turned out soooo rich, I was glad I made them smaller) Melt the milk chocolate chips in the microwave for 2 minutes on half power, stirring halfway through the heating time. Melt completely, but be careful not to overheat. Resting a bar on a fork (and using your fingers if needed), dip each bar into the chocolate to coat completely and place on wax paper. (This is where I ran into trouble. I couldn't seem to get the choc chips to melt into a thin enough texture, so when I was dunking the squares they were getting overloaded with choc. I ended up mixing what was left from the first bag of choc chips with some "chocolate discs" made specifically for melting. I also melted about 1 tsp of veg shortening into the mixture for additional smoothness. This seemed to really help) Cool till firm at room temperature, 1 to 2 hours.
  • Makes 14 candy bars. (or about 36 squares if you go that route!)
Here is some of the process.
Greg carefully monitoring the temperature - it's the chemist in him coming out!

Greg combining the "liquid hot magma" (name the movie!) mixture with the eggs - it's starting to look like he did all the work but I promise I did everything else!

Action shot of my shiny, new Kitchen Aid doin' it's thang.

Cooled bars cut into squares.

And a few of the finished products - it was fun decorating with the leftover chocolate:)

Greg approves!

See, not only does it taste like a 3 musketeer bar, it also looks like one on the inside!

This recipe was so much fun. Greg and I enjoyed a few each and then I sent the rest to work with him today. I knew they were too dangerous to keep around the house!

I will be back later this week with my final cake from the Wilton course I'm taking and I'll fill you in on class 1 and 2 - hopefully I "graduate" tomorrow night!

So what was everyone's sweetest moment of the day? Other than sneaking in one last 3 musketeer square, I was really uplifted to stumble upon this website called Operation Beautiful. It's a site focused on spreading positive body image among women via post it notes left secretly on bathroom mirrors, drive thru windows, dressing rooms, and other places women are likely to see them. It's great to see women encouraging one another for a change! Hope you all have a wonderful day!

xoxo